

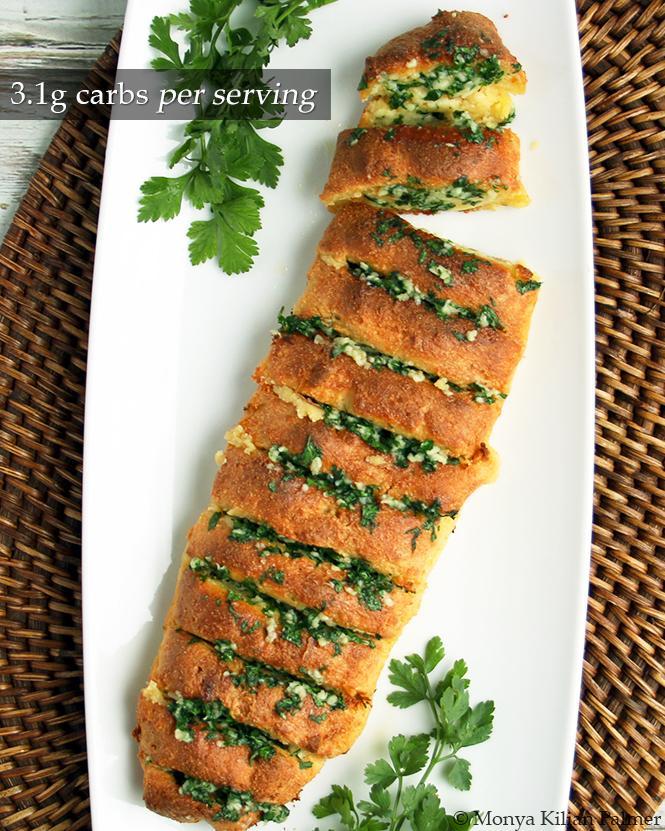
“This is a fantastic keto garlic bread using the fathead dough concept. This recipe will yield 12 slices and the macros have been calculated on one serving = 2 slices. If sealed well, almond flour will last a long time (I keep mine in the fridge). Be sure to also check out all the other Bread recipes on this site.” – Monya

 Fats of Life® is a keto and low carb recipe blog that I love to run as a hobby in my spare time. I am also the author of the best-selling Keto Kitchen Series of cookbooks. This includes my debut best-seller Keto Kitchen (2020). The fun and exciting Lazy Keto Kitchen (2021). And, the clever and inspiring Budget Keto Kitchen (2022). My 4th cookbook, Quick Keto Kitchen (2023) is as fantastic as the first three, and packed with spectacular, easy creations!


 The links above will take you to Amazon UK. For USA and other countries, see the global Amazon links here: Keto Kitchen ; Lazy Keto Kitchen ; Budget Keto Kitchen ; Quick Keto Kitchen.

The Glow Factor, 2025 by Penelope Corwin is available worldwide. The image above will link to Amazon UK. For USA and all other countries, click here.
More on Tear-and-share Keto Garlic Bread…
Fathead dough is a versatile and low-carb alternative to traditional wheat-based dough. In my twist, I shape it into a garlic bread ‘loaf’ for this recipe – and even went on to fill the little incisions with a homemade garlic and parsley butter.

FOLLOW MONYA:
-

-

-

-

-

Garlic is known to help lower blood pressure. It may also improve circulation and reduce the risk of blood clot formation. It is rich in antioxidants like allicin, which can help combat oxidative stress and reduce the risk of chronic diseases.
Garlic also contains compounds that have anti-inflammatory properties, potentially helping with conditions related to inflammation, such as osteoarthritis.
Parsley, on the other hand, is packed with vitamins and minerals, particularly vitamin K, vitamin C, and vitamin A. These nutrients are essential for bone health, immune function, and vision. Like garlic, parsley also has anti-inflammatory properties, which can help reduce inflammation and alleviate symptoms of conditions like arthritis.
Parsley’s natural oils can help combat bad breath, making it a natural breath freshener. This is why it is often added to dishes that contain garlic.

It is important to note that to maintain ketosis, it’s essential to track carbohydrate intake and ensure it aligns with your daily macro goals. Consulting with a healthcare professional is advised before making significant dietary changes. Scroll to the bottom to see the full macros and allergens for this Tear-and-share Keto Garlic Bread, as well as all the Fathead Dough-inspired recipes on Fats of Life®.


Tear-and-share Keto Garlic Bread
Per serving
Equipment
Ingredients
For the bread
- 50 g (1.8 oz) almond flour
- 50 g (1.8 oz) extra-fine almond flour
- 1 tsp baking powder
- 1 tsp garlic powder
- generous pinch of salt
- 170 g (6 oz) grated mozzarella cheese
- 85 g (3 oz) full-fat cream cheese (soft cheese)
- 1 egg
For the garlic butter
- 50 g (1.8 oz) unsalted butter, softened (room temp)
- 5 g flat leaf parsley, finely chopped
- 5 cloves garlic, peeled and crushed
- pinch salt
Instructions
- Preheat the oven to 170°C (fan oven). This is 190°C for conventional ovens (or 375°F / gas mark 5).
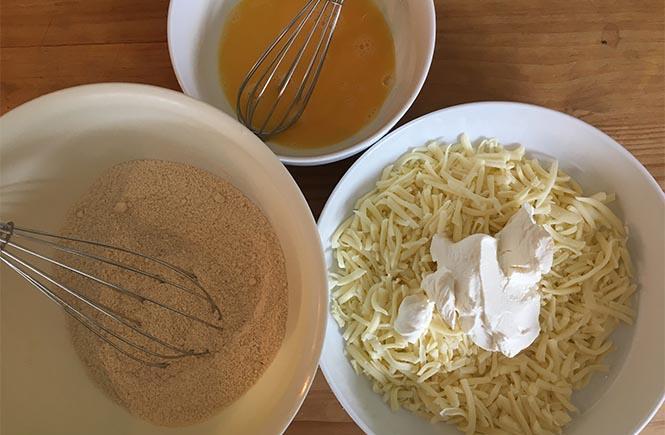
- Combine the almond flour, extra-fine almond flour, baking powder, garlic powder and salt together in a bowl. Whisk the egg well in a separate bowl.
- Place the mozzarella into a wide-bottomed, microwave-friendly bowl. Add the cream cheese. This is what you should have ready:
- NOTE: If you are concerned about the small amount of potato starch in some store-bought ready-grated mozzarella, you could use fresh mozzarella. However if you do, roughly chop the fresh mozzarella into small pieces. (We melt it anyway, but in this way you can ensure even melting.)
- Place the bowl of cheese in the microwave for 1 min 40 seconds, until the cheese completely melts. VERY IMPORTANT NOTE: If you chose to use fresh mozzarella, you MUST tip out all the excess liquid which separates from the melted cheese as this will make your mixture far too runny. (You won't have this issue when using store-bought ready-grated mozzarella. Macros for this recipe are based on the latter, but I switch up the kind of mozzarella I use in my fathead dough recipes, and as long as I tip out excess moisture from the fresh kind - they are inter-changeable, so use whichever you prefer.)
- While the cheese in the microwave, place the almond flour mixture into a mini food processor.
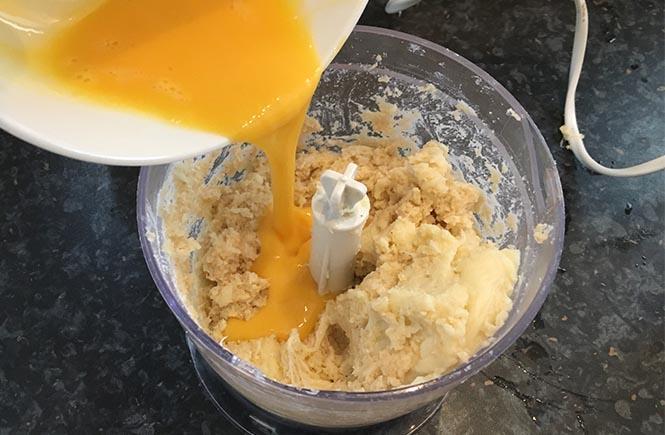
- Immediately tip the melted cheese mixture into the mini food processor. Blitz well. You may have to stop and scrape down the bowl, or in some cases, unwrap the stringy mozzarella which might 'wrap' around your blade, and blitz until combined.
- Add the egg and continue to mix until it comes together as a sticky dough. NOTE - if you feel like your 'dough' is far too 'wet', add a tablespoon or two of almond flour. You shouldn't have this problem if you tipped out ALL the excess watery liquid after melting the (fresh) mozzarella. (And you won't have this problem at all if using store-bought, ready grated mozzarella.)
- Tip the dough onto a sheet of baking parchment paper.
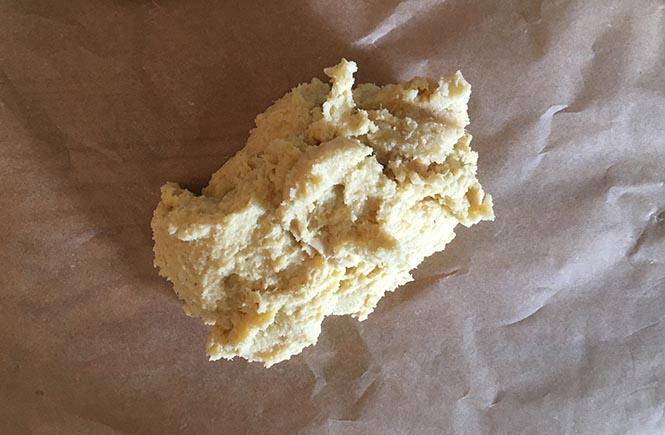
- After the dough has cooled a little (making it easier to handle), use your hands and a pastry scraper to shape the dough into a long log.
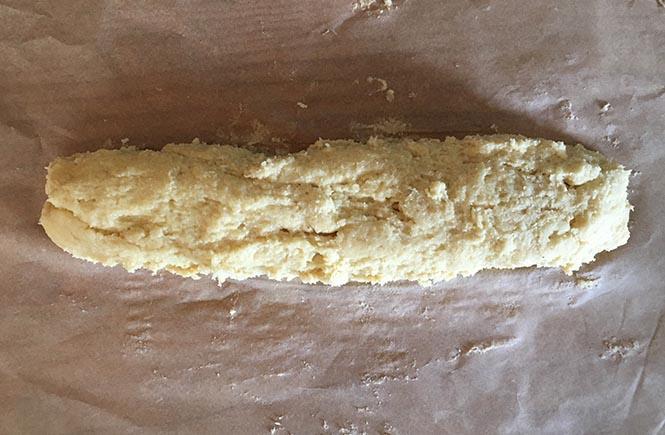
- Run a sharp knife under very hot water, then slice the dough into 12 equal-size pieces - but do not slice all the way through, three-quarters of the way down will suffice. Run your knife under the hot water between each slice. This will help not "squash" the dough when slicing.
- Place the parchment with the sliced dough onto a baking tray. To ensure the log keeps it shape, I scrunched up foil on either side of the log under the parchment to allow the bread to fit snugly in-between. Place the tray in the preheated oven for 15 minutes.
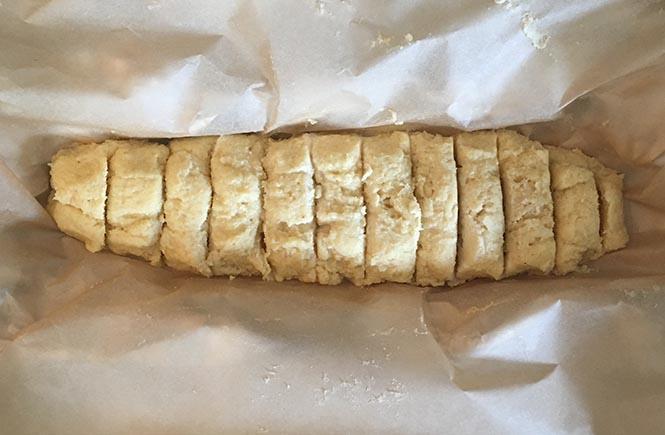
- After 15 minutes, remove the tray from the oven and use your knife to make the incisions again in case they may have baked 'closed'.
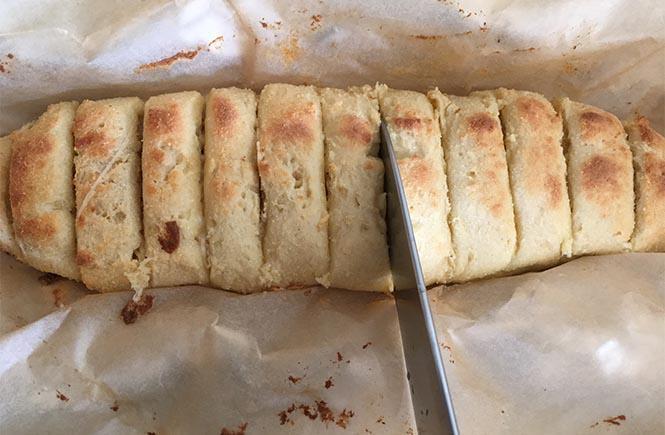
- Return to the oven for another 10 minutes.
- In the meantime, make the garlic butter by simply adding the softened butter, finely chopped parsley and finely crushed garlic in a small bowl. Season with salt and combine well. (NOTE: I used a garlic press here to ensure I only yielded the lovely inner garlic flesh. Discard the bits left in the press between crushing each clove.)
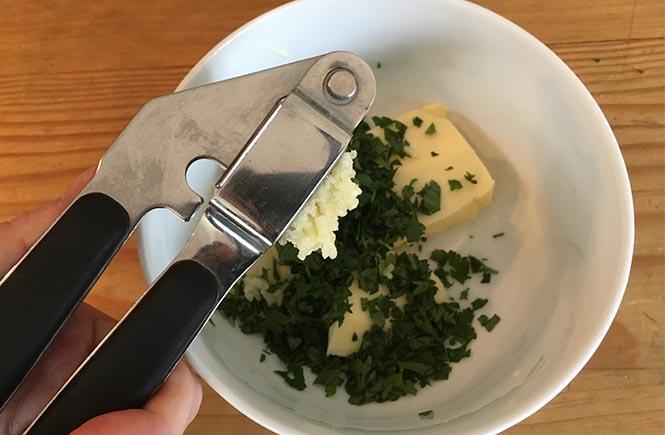
- After the full 25 minutes in the oven, remove the tray and fill the incisions with the prepared garlic butter. I used a palette knife to do so, but a small spoon or knife will work fine.

- Return the tray to the oven for 5 minutes, but switch the oven off and allow the residual heat of the oven to gently finish the bread and melt the butter.

I used extra-fine almond flour as well as regular almond flour in this recipe to achieve the texture I wanted. If you choose not to use extra-fine almond flour, you may end up with a very sticky, moist dough mixture - so I encourage you to have a bag of the extra-fine stuff on hand because I love it and will be using it often in the future.
 My name is Monya Kilian Palmer. If you loved this recipe, please follow and tag me @mkilianpalmer on Instagram so we can all see your lovely creations!
* * *
My name is Monya Kilian Palmer. If you loved this recipe, please follow and tag me @mkilianpalmer on Instagram so we can all see your lovely creations!
* * *
 The links above will take you to Amazon UK. For USA and other countries, see the global Amazon links here: Keto Kitchen ; Lazy Keto Kitchen ; Budget Keto Kitchen ; Quick Keto Kitchen.

 Nutritional Information per serving (2 slices)
Calories 300Kcal / 1255kJ
Fat 27g
Carbohydrates 3.1g
Protein 12g
Allergens
Almonds
Eggs
Milk
See all the Fathead Dough-inspired recipes on Fats of Life:


 Disclaimer: The nutritional analysis, macro and allergen breakdown of the recipes on this site have been manually and carefully calculated using the cloud-based software NUTRITICS®. NUTRITICS® is fully approved by the relevant Trading Standards organizations and is EU and FDA-compliant. The macro calculations are provided as a courtesy to you based on the author's weighing of ingredients when creating the dishes. If Erythritol (a sugar polyol) has been used in any of the recipes, it has already been manually excluded from the final carbohydrate count. The author is a chef - not a medical professional - and this website has been designed to provide you with recipe ideas to suit the low carb lifestyle you have discussed with your GP.
3 Comments
Hello,
I am loving your recipes, thank you. Just to ask if this could be made ahead, such as the day before. many Thanks
Hi Debbie,
Great question! I wouldn’t personally bake it beforehand, as the melted cheese inside the ‘dough’ may harden and respond unfavourably once reheated the next day. However, you could make and shape the log of dough ahead of time and keep covered in the fridge. Then remove from the fridge about 45 min before baking in a preheated oven. This just ensures the dough isn’t super cold going into the oven.
x
Drop me a line if you have any questions or comments about this recipe. I will do my best to reply as soon as possible! Monya xxx